Create a new standing order
Find the customer, add their products
- Go to Customers.
- Select the customer. (There's a search box in the top right if that's easier).
- Click the Create standing order button.
- Click Add for each product required on the standing order.
- When you're finished adding products, click Done.
Update quantities for each day
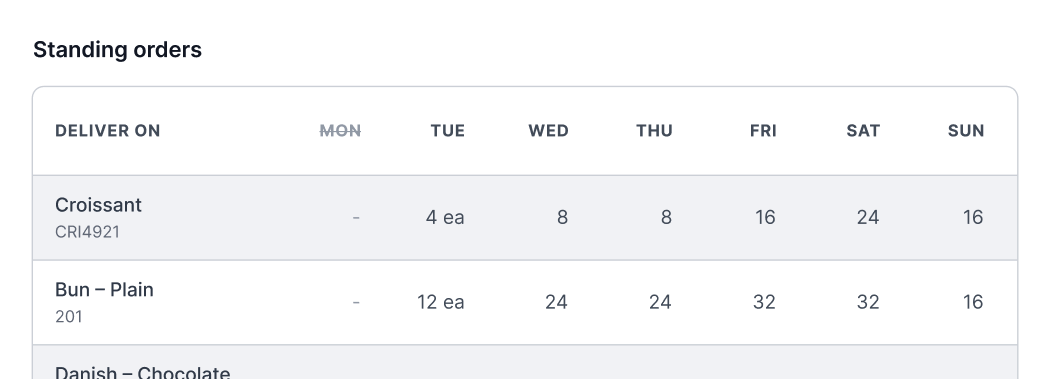
- For each product, type in the required quantity for each delivery day. Note that the columns labelled Mon – Sun are for delivery days. See below for more detail about when orders will be generated.
- Leave a product's quantity as 0 on days that this product is not required. (If you leave a product with a 0 quantity for every day of the week, it will not be saved.)
- Click Save.

When will I see the order?
Standing orders will be automatically generated up to 2 hours before your specified cut-off time. Here are some examples to make this clearer:
- If you deliver goods on Friday with a cut-off time of Wednesday 11 PM: Friday's standing orders will be generated between 9-11 PM on Wednesday.
- If you deliver goods on Monday with a cut-off time of Monday 9 AM: Monday's standing orders will be generated between 7-9 AM on Monday.
What will the orders look like?
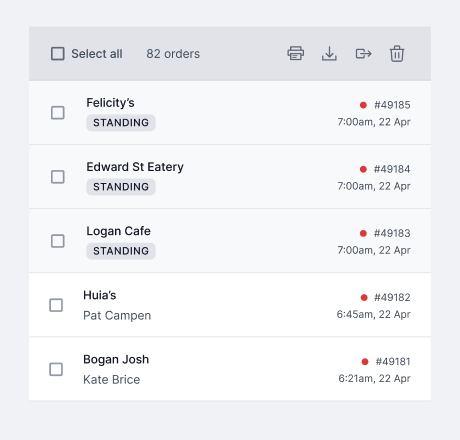
Standing orders act just like any other order. They will appear as any other order in your Orders tab on desktop and in your 'Received' orders tab on mobile. These orders can be:
- printed;
- downloaded;
- sent to accounting software to create an invoice (eg, Xero, MYOB or Infusion);
- have their status updated (eg, New, Processing, Invoiced or Complete); and,
- deleted (note deleting an order does not update the standing order instructions, you must do this in the Customers section).
One key difference is that standing orders will have a label "Standing" underneath the customer's company name. Because this order has not been sent to you by a person at the company, there is no person's name on the order like other orders.

